Tuesday, October 12, 2010

GWEN DRISCOLL ~ INTERIOR DESIGN IN KENTUCKY

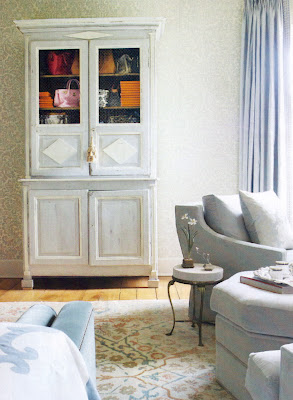
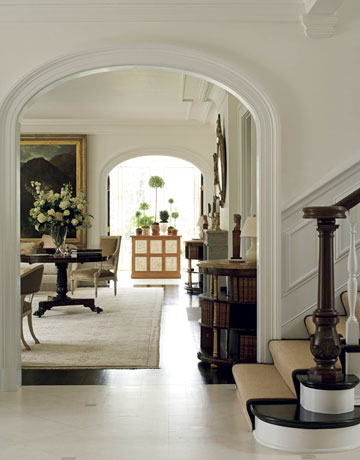
Jane Scott Hodges never expected to end up back in her childhood state of Kentucky, but after Katrina, she  was evacuated from New Orleans.  At home in New Orleans, Jane had just opened her flagship office of Leontine Linens two weeks prior to the hurricane hitting.

The rest is history.  When Jane saw that the home of her childhood dreams was available, she and husband Philip purchased the home and soon moved in.  The home is absolutely beautiful, nestled in the beautiful town of Georgetown, Kentucky.

Interior designer Gwen Driscoll designed the interior, and as you will see, it is absolutely stunning.  In addition to her interior design business, Gwen is also the author of Ragland Hill Social, a popular blog, and her website, Gwen Driscoll Design, so I was so excited to see that she was connected with this lovely effort. Congratulations, Gwen!

Don't forget to maximize your screen and ENJOY!


I hope that you have enjoyed this post. There is NO WAY that these scans capture the beauty of this home, so pick up your copy of the November issue of Elle Decor.

See you soon,
Teresa
xoxo
 photo signature_zps513df16d.png

Sunday, October 10, 2010

MILES REDD AND GIL SCHAFER IN NEW YORK

MY HEART JUST SKIPPED A FEW BEATS.  I opened the latest Elle Decor, and what did I see? Miles Redd and Gil Schafer at work together in New York. Not just my favorite interior designer of all time alone, but Redd at work with the great architect Gil Schafer. Need I say more?

When Gil Schafer was asked to design a home for a couple in the Hudson River Valley, he called for Miles Redd to decorate it.  What follows is the result of a match made in real estate heaven.

I will waste no time writing about my admiration for the work of Miles Redd, because if you read my blog, you already know that I AM ONCE AGAIN IN TOTAL BLISS as I write! As you will see, there is a reason for this party going on in my head. Miles Redd is a design genius alone, but along side the talented Gil Schafer?! Too much to comprehend? You be the judge. Be sure you have your screen set on maximum to get the full impact! ENJOY!


I hope that you have enjoyed this post!  To see more of Miles Redd and Gil Schafer, visit previous posts.

To read more about this and other beautiful homes get your copy of the November issue of Elle Decor. It is by far the best Elle Decor I have read!

Good job Michael Boodro!! The entire issue is absolutely beautiful!

See you soon,
Teresa
xoxo
 photo signature_zps513df16d.png

Saturday, October 9, 2010

Crème Brûlée

My son and I both have been preparing this recipe for years, and I hope that you will ENJOY this dessert as much as we do!

Crème Brûlée


Ingredients

1 quart heavy cream
1/2 vanilla bean or 1 tsp. vanilla extract
1/2 cup sugar
10 egg yolks
Pinch salt

For the caramel topping
1/2 cup sugar
Heat the oven to 325°F.

Heat the cream in a medium saucepan over medium heat until scalded (you'll see small bubbles on the sides of the pan). Split the vanilla bean in half, if using, and scrape the seeds into the cream.

Meanwhile, in a medium bowl, slowly whisk the sugar into the egg yolks. Slowly whisk the hot cream/milk into the sugar/yolk mixture. Strain the mixture through a fine sieve into a pitcher or measuring cup. Stir in the salt and vanilla extract, if using.

Arrange eight 6-oz. ramekins in a baking dish with deep sides. Pour the custard into the ramekins, fill the baking dish with water to come halfway up the sides of the ramekins and cover the dish with foil.

Bake until just set, 25 to 50 min. Be sure to start checking early; baking time will depend on the thickness and depth of your ramekins and baking dish. Carefully remove the baking dish from the oven and let the ramekins cool in the water bath. Remove, cover with plastic wrap and refrigerate at least 2 hours or up to 2 days.

Follow the instructions below for making the crackly topping.

Two ways to make a crackly caramel topping for crème brûlée:

The blowtorch method:

By far the easiest method of caramelizing sugar on a crème brûlée is with a propane blowtorch. Blowtorches are sold in most hardware stores, or at Williams Sonoma. I highly recommend buying one with an automatic ignition, which allows you to light the torch with the press of a button -- no matches needed.

Sift a thin, even layer of sugar over the refrigerated custards, ignite the torch, and with a slow, sweeping motion, guide the flame directly on the surface of the custard. The nozzle should be 2 to 3 inches from the surface, with the tip of the flame licking the sugar. The sugar will melt slowly at first and then caramelize. As soon as the entire surface is glossy brown, move on to the next custard.

The broiler method:

This method is only successful with a very hot broiler in a gas oven (electric ovens don't seem to provide heat high enough to caramelize the sugar).

Line a baking dish with a towel to keep the baked custards from sliding around and arrange them on top. Fill the spaces between the ramekins with ice and add water so that they're surrounded by ice water. This will keep them cold and creamy while their tops are being caramelized.

Sift a thin, even layer of sugar on the surface of each custard and gently slide the baking dish under the broiler, positioning it so that the flame is 2 to 3 inches away from the tops of the custards.

Watch carefully: within three or four minutes, the sugar will melt and then caramelize.

Remove the baking dish and take out the ramekins. Fill the spaces between the ramekins with ice and add water so that they're surrounded by ice water. This will keep them cold and creamy while their tops are being caramelized.

ENJOY!

See you soon,
Teresa
xoxo

nutrition information (per serving):
Calories (kcal): 580; Fat (g): 50; Fat Calories (kcal): 450; Saturated Fat (g): 30; Protein (g): 6; Monounsaturated Fat (g): 15; Carbohydrates (g): 29; Polyunsaturated Fat (g): 3; Sodium (mg): 90; Cholesterol (mg): 430; Fiber (g):0

photo: Ben Fink
Fine Cooking

 photo signature_zps513df16d.png

FABULOUS FOYERS

Out of the many foyers that I have seen, these are a few of my favorites. I hope that you will ENJOY my choices.  Remember, a foyer is the initial impression of the interior of your home, so much thought should go into planning this area.

 Kay Douglass

 Michael S. Smith

Jonathan Adler

 William Hodgins

 Ned Marshall

 Randall Powers

Susan Ferrier

I hope that you have enjoyed these rooms.  Have a nice weekend, friends.

See you soon,
Teresa
xoxo
 photo signature_zps513df16d.png

Friday, October 8, 2010

CHICKEN PARMESAN

This recipe by Malto Mario is delicious! Perfect for a chilly fall night.  ENJOY!


Chicken Parmesan


Ingredients

Basic Tomato Sauce

  • 1/4 cup extra-virgin olive oil
  • 1 3/4 cups chopped onions
  • 4 garlic cloves, minced
  • 3/4 cup coarsely grated peeled carrots
  • 3 tablespoons chopped fresh thyme
  • 2 28-ounce cans peeled whole tomatoes in juice

Chicken

  • 10 skinless boneless chicken breast halves
  • 3 cups fresh breadcrumbs (from crustless French bread ground in processor)
  • 2 large eggs
  • 1 cup (about) all purpose flour
  • 6 tablespoons (or more) olive oil, divided
  • 3 cups coarsely grated well-drained fresh water-packed mozzarella,* divided
  • 1 1/4 cups freshly grated Parmesan cheese, divided
  • 1 1/4 cups freshly grated Pecorino Romano cheese, divided
  • 2 tablespoons chopped fresh Italian parsley
  • 1 tablespoon chopped fresh marjoram

Preparation

basic tomato sauce

  • Heat olive oil in large saucepan over medium-high heat. Add onions and garlic; sauté until onions are soft and golden, about 10 minutes. Add carrots and thyme; sauté until carrots are soft, about 5 minutes. Add tomatoes with juice; bring to boil, coarsely crushing tomatoes with potato masher or fork. Reduce heat to medium-low; simmer until sauce thickens and is reduced to generous 5 cups, about 1 hour. Season sauce to taste with salt and pepper. DO AHEAD Sauce can be made 1 day ahead. Cool slightly. Chill uncovered until cold, then cover and keep refrigerated. Rewarm sauce before using.

chicken

  • Place chicken breast halves between 2 sheets of plastic wrap. Using meat mallet or rolling pin, pound chicken breasts to 1/3-inch thickness. Sprinkle both sides of chicken with salt and pepper. Spread breadcrumbs on plate. Whisk eggs to blend in medium bowl. Spread flour on another plate. Coat both sides of chicken with flour, then eggs, then breadcrumbs.
  • Preheat oven to 350°F. Heat 2 tablespoons oil in large nonstick skillet over medium-high heat. Working in batches, add chicken to skillet and cook until brown, about 2 minutes per side, adding more oil as needed (chicken will not be cooked through). Transfer chicken to platter. Spread 1 cup sauce over bottom of 15x10x2-inch glass baking dish. Arrange 1 layer of chicken over sauce. Spoon 2 cups sauce over. Sprinkle half of mozzarella, Parmesan, and Pecorino over. Repeat with remaining chicken, sauce, mozzarella, Parmesan, and Pecorino. Bake until cheeses melt and chicken is cooked through, about 20 minutes. Sprinkle with parsley and marjoram and serve.
  • *Available in 1/3 -ounce, 1-ounce, and 8-ounce balls at many supermarkets and at specialty foods stores and Italian markets. Regular mozzarella can be substituted.

    I hope that you will enjoy this recipe!

    See you soon,
    Teresa
    xoxo

    Bon Appetite Magazine

 photo signature_zps513df16d.png

CHRISTOPHER PEACOCK ~ KITCHEN HEAVEN

Thomas Peacock is a talented cabinet designer, and he heads up the marketing programs and the kitchen design business that he opened 18 years ago.  Peacock called on interior designer Sophie Thibon to assist in the design of his own family's beautiful kitchen.  This is GORGEOUS.  ENJOY!


To read more about this beautiful kitchen visit here.  Look for a great stick-to-your-ribs recipe this weekend.

See you soon,
Teresa
xoxo
 photo signature_zps513df16d.png

Thursday, October 7, 2010

KITCHEN ORGANIZATION

These beautiful kitchens all have one thing in common; they have great storage built in.  When I build my next home, a large percentage of the budget will be spent on my dream kitchen.  ENJOY!


I don't now about you, but I can always use some organization in the kitchen.  To see more visit here.

See you soon,
Teresa
xoxo

Traditional Home 2010
 photo signature_zps513df16d.png